Showing posts with label farmland tales. Show all posts

Wednesday 17 June 2020

A Day At The Farm

Another weekend At Our Tiny Farm 


We came in from the city last night so that we could start work early morning work. So after being woken up by the dogs early morning at 5am to a beautiful morning with low hanging clouds I made a beeline to the garden. The morning started off with low lying clouds floating by but the afternoon would be a different story.


 I got down to sowing some seeds. Spent about an hour getting the French beans, spinach and radish seeds into the soil. Harvested some tomatoes, French beans, and tomatoes 🍅. All grown organically.


Steeped some organically grown peppermint and stevia in green tea to kick start my morning. It’s over the weekends that we tend to the farm. 


Today, along with my husband and teen daughter, managed to get the next set of we managed to get the support for my trellises up for the beans seeds sowed. Beautiful day as the rains came in bits and spurts. What started as a pleasant morning was quickly turned into a stormy afternoon, with rain and winds howling away. 


The contrasts of the same landscape between mornings are evening was amazing. On Sunday I managed to get some time to spray an infusion of neem oil, asafoetida, baking soda, and a tiny amount of soap over my plants to keep aphids and other bugs off my crops. Asafoetida has proven to be very effective against termites and ants. Being a completely organic farm I keep looking for organic options to get rid of pests. If anyone you have more suggestions of how I could keep caterpillars and Crickets out please do mention in the comments. Some of my produce harvested over the weekend. 


Sunday 5 April 2020

FarmLand Tales - The Next Big Step

Planting The Saplings - Tiny farm Large Life

Plans !!!! why do I ever make them? I had planted a lot of seeds as I had PLANNED on finishing my #nodigbeds and bought some seedlings from the nearby farmer's nursery too. AND then what happens ?? #CORONAVIRUS. No thankful I am still and so is my family but the world around is falling apart.

And everything is on a #lockdown. No movement, #stayhome and stay #quarantined.

We had thankfully managed to plant the chrysanthemum seedlings, a whole row of egg-plant seedlings, a few peppers, and squash seedlings before things froze. As we stay in the city, due to our regular jobs we weren't able to go back to the farm as we do every weekend.

Three weeks ago we got 2000 saplings of chrysanthemums and about 600 cuttings of roses. Along with that 100 seedlings each of peppers, tomatoes and eggplants.

We prepared the beds for chrysanthemums with #neemcakes and #bonemeal. Then got out the drip irrigation pipes laid before covering them with plastic mulching sheets. I bought the mulching sheets online via amazon.in .  The ones I picked up were 4 feet wide and about 25 micron. Next time I do want to try out a more eco-friendly option and would like to try using straw instead. While plastic mulching is quick and easy I am a bit uncomfortable with all that plastic. But as I want to conserve water and reduce the growth of weeds, mulching is a must.

It took us a whole day and three sets of hands to complete the transplanting of chrysanthemums. By the end of a long hot, and tiring day we got the job finished. So YAY!! For both my husband and me all this is new :)

But we were happy.


The next weekend we started on to get the #roses and food plants into the ground. Made this small video covering the events.


Tuesday 10 March 2020

Farmland tales-No dig Beds

To Dig Or Not To Dig - Tiny Farm Large Life

March -2020

It's been a while since I posted my updates. A lot has been on, on the farm but progress has been slow.
We were also trying to get our container house up, which went through its own cycle of ups and downs. I'll cover that in another post

I have been reading and learning a lot about #notill beds and #nodig beds and so I wanted to try it out. Our land hasn't been tilled for years and while it's fertile it has a rocky touch to it. So as a first timer we had to dig the major part of the land. I still retained a part of it since inquisitive me wanted to try out raised beds to grow some of the vegetables.

I got some good organic compost and started on with two beds two begin with. The progress can be seen through the images shared below.

My red lady papaya plants seem to have grown a bit and are happy with the sunshine.


To start with I dug a tiny bit into the hard ground which I think was of no use finally, then laid out a layer of cardboard. Wetted the cardboard a bit before laying out a layer of compost. This was followed by a layer of dry leaves and then a layer of soil.

I still haven't been able to get the edges of the raised bed done as I have hardly been able to come to the farm in the last couple of months.

I just managed to get it done for one small bed in which I planted some spinach seedlings.

For the rest of the farm, we did a regular tractor tilling, leveling and smoothing before we laid out the pipes for drip irrigation.

To help improve the soil quality we got in a cartload of chicken poop manure, along with neem cakes and bone meal. With the first phase of nourishing the land done, we will not get on to making the beds before laying out the mulching sheets.

More coming up in my next post.


Wednesday 20 November 2019

Farmland tales - The Passion Fruit House

Nov -week 3 :Tiny Farm Large Life gets a passion fruit house 


Or I should say almost. This weekend I visited the farm after a gasp of two whole weeks. The rain and my work travel had made it really difficult to make it to the farm.

A couple of weeks back I had planted passion fruit plants. At that time I had only given those tiny plants temporary support. But passion fruit plants can grow 5-8 feet and a good support. So instead of regular trellis I decided on making a cozy Passion fruit shed.

We bought some wood from the wood seller close to the farm and got my husband to start working on the structure. This is what we ended up making


Someday hopefully once the Passion fruit creepers have gown and cover the entire structure it would be a prettier site. Until then .... it’s a big dream on our tiny farm. 

So while my husband was digging and tying the wooden pieces to get the structure into place I went about my rock collection. Unfortunately we have a lot of rocks on our tiny farm but I am trying to make full use of them. So started of making my little pathway. 

It’s not anywhere even close to done ... infact just started off now. But hopefully as we go along,  my pathways will get some more structure. This weekend our guava plant also surprised us with beautiful white blossoms. Though I know it’s too early for the plant to bloom.... I just couldn’t help feeling happy. Maybe next week when I come back here I’ll pluck the flowers and let the plant spend its energy on growing rather than blossoming so early. But for today it stays.


Another surprise was this weed I found growing . I don’t know it’s name but it was beautiful 


If anyone knows it’s name please do let me know . 


Saturday 16 November 2019

Farmland Tales- It’s not a bed of roses always

Germination Blues- Tiny Farm Large Life


It’s not a happy picture always and sure it’s not one around my germination kits. This time across all my seedlings .... I have had only one germination per plant type !!!!! How does one explain that ....hmmm!!!!


And all from different seeds . And I have always had almost 70% germination success.


You can see in the image up there is only one Lemon Balm guy peeking its head out, one Lavender, one marigold, one Calendula !!! The only 1 I am happy with ... so far ... is the one creeper rose 🥀 that’s sprouted. I have never germinated a rose plant from a seed ever before and didn’t think I would see any joy. So this time just to try it out I sowed two creeper rose seeds and one germinated. It took a good 3 weeks to finally burst open. But it’s still a wait and watch to see if that guy has the strength to continue growth.

So for me I need to restart the process of sowing my seeds again. Maybe this time I won’t directly sow them in loose cocopeat but will try the compact cocopeat coins which swell up when you add water to them. I order some from Biobloom online on Amazon.


Thursday 31 October 2019

Farmland Tales - Planting Fruit Trees

Farmland Tales - Planting Fruit Trees - Oct Week 4

Passion Fruit, Mango And Citrus Plantation 

So what's happening this week at our tiny farm with big dreams? 

Today is planting day again if I had a wand I would have converted our piece of the farm into a food forest in a woosh. I really want to get the garden up and green but well things are going to be slow. So we made one more trip to the nursery and got our selves some sweet lemon plants, Kafir lime, Mango, orange, two more passion fruit plants, and Betel nut leaf creeper. And of course, we have Bogey, our Shih Tzu, out here again with us.


Purple Passion Fruit 
In India, Passion Fruit is grown in many states. The two main variants of passion fruit in India are the purple passion fruit and the yellow passion fruit. Kerela has been lately leading in the cultivation of passion fruits in India.

I will come back in a couple of weeks to get my structure ready for the Passion fruit plants. One needs to have a spacing of at least a foot between two plants while planting these beauties, as they can grow up to about 8 feet. Since the plants can last up to 4 years - if not more - they need a good structure or trellis for them to grow. The first fruit-bearing generally happens in 6-8 months and the first year is generally not so great in terms of numbers of fruits but from the second year on each plant should be bearing about 200 or more fruits per vine.

For the lemon, mango, lemon and orange plants we dug holes about two feet into the soil at a gap of about 15 feet, added in some organic compost and placed the plants and filled the holes with dirt.

We spent a few hours planting and painting the walls and finally exhausted camped out for some beer.

Kaffir Lime
Planting Kaffir Lime 


The sun can get really hot and exhausting by around 11 am so we try to plan our work early in the morning before its gets too hot. Ofcourse then its picnic and camping time before packup.
And you can guess who had worked the most ....!!!


Monday 28 October 2019

Hydroponics - My first Attempt

Hydroponics - My first Attempt At Kratky System


Before I set up my hydroponics system at the farm I wanted to try my hand at it. To understand it better and make all the mistakes I needed to make while my investments were small. And so started my small experiment in what I call my green-home-lab.

I started from scratch, which meant, starting all the way from sowing and germinating seeds organically, to setting up my system. You can read all about the method I followed for seed germination in my blog by following the link above. For my experiment, I used Jalapaneo and tomato seedlings which I grew from seed.

Kratky system is one of the simplest hydroponic methods of growing food. This involves growing plants in still clean water by adding organic nutrients in intervals and aerating the water at regular intervals. Here is a step-by-step process of setting up your first Kratky system

Step 1
Get online or hop to your nearest gardening equipment store and get your self some net cups, cocopeat, hydroponics nutrients, and small clay balls - these would be needed to support the plant as it grows.

Step 2
Preparing the container to grow your plants. You could use a mason jar or old pet bottles. Select the jar in such a way that your net cup fits well at its mouth. The net cup shouldn't slip into the jar nor should it stand out above the jar. The rim of the net cup should sit firmly on the rim of your mason jar's mouth. Incase you are using pet bottles, carefully cut the top of the bottle so that the net cup sits on its rim well. See the image below to help you get an idea.
Now cover the outer surface of your container with silver foil so that no sunlight can reach the roots once you have planted your sapling. This is important because if sunlight starts getting to the water it can promote the growth of harmful bacteria and algae which would lead to root-rot and eventually decaying of your plant.

Once this is done your container is ready to be used

Kratky, hydroponics , soiless cultivation
Container Preparation For Kratky System - Hydroponics 


Step 3 
Once your seedling has grown two to three true leaves it is ready to be transplanted. Add a few clay balls to the base of the net cup then add in your seedling and pack the sides with a bit of coco peat and clay balls. Now you fill your Kratky container prepared earlier with RO water and add in the nutrients as per the instructions on the nutrient box's cover. The nutrients ware mainly NPK mix and Epsom salt. Next, gently place the net cup with the plant on to the month of your jar.

And that its. Place the jar either under LED lights or at a place where you don't have strong sunlight. Ensure you aerate the water using a simple aquarium air pump every day for at least 20 - 30 minutes (if not more)

A few things to be cautious about ....ensure water stays clean. If you see the water clouding or the roots turning a dirt brown it means there is some bacterial activity on. Change the water immediately.
And if needed clip the brown roots.
The root system should be healthy and white

That’s how I set up my Kratky system and now I have healthy Jalapeños and tomato plants


Tuesday 15 October 2019

Seed Germination

Germinating Seeds Using Coco Peat 


Over the past few months I had read so much about Hydroponics and researched quite a bit both online and by meeting some of the experts around town that I really wanted to get down to doing it myself....yes I am a bit impatient.

I started my experiment about two months back. The developments at the farm were slow so I jumped into setting up my own Kratky system at home. This method of hydroponics is super easy and you can set it up at home with minimum investments. I will write more about it in my next blog.

But to get started I first needed healthy seeding.

I started by ordering some coco peat and seeds via amazon. Coco peat is an excellent alternative for soil. Because it is light and fibrous it allows air to flow and prevents moulds from forming. Moulds are one of the main reasons for low seed germination.

Received my packets of Cherry Tomato and Jalapeno seeds in a week and that got me going. I started by first preparing the Coco peat for sowing the seeds. As my Coco peat brick was quite big ( 1kg ) I broke about 2-3 inches from one side and put it in a small tub.

Next soaked it in about 1 liter of water for about two hours for it to swell. Before careful about not adding too much water. You can always add in a little water first and once it's absorbed if you think the Cocopeat is still dry add in some more. Coco peat on wetting expands about 5-6 times. So if you are using it for the first time break off smaller chunks, soak them in water and let them swell. Add in more Coco peat only if you think you need more.

Next, I divided the damp cocopeat into two containers that had transparent plastic lids. Once I had smoothened the fibers of cocopeat I started with making small 1cm holes. Next came the sowing stage for the Cherry tomatoes. I dropped in one seed into each hole and gently covered it with Cocopeat. At this stage be gentle when you cover the seeds. We don't want to push the seed way down. Gently brush the cocopeat over the hole to cover it.

Once I had finished with the tomatoes I moved over to sow the Jalapeno seeds. Followed the same steps as above. 

Then I covered the lids of the containers and place them under LED lights. In about 4 days the germination had started

hydroponics, germination , Kratky , organic farming
Setting up the Germination Process 

Wait until the seeds have about one to two sets of true leaves. That's when they would be strong enough to withstand transplantation.

During the course of time that you are waiting for the true leaves to come out, you might need to sprinkle a bit of water in case the Coco Peat starts to dry out. Just ensure your water is JUST ENOUGH.....we don't want the Cocopeat to be runny at any stage. It should resemble lose fluffy damp soil
  

Sunday 13 October 2019

Farmland Tales - Oct Week 3

Planting Passion Fruit   

Oct Week 3 - Its Saturday again....suddenly for us, Saturday has a new meaning.
Our work here is still on a slow note, we are still waiting for the electricity to come in. We had initially contemplated going off-grid but then have dropped the idea for now.

 SO ...the update for this weekend is a bit of wall painting, made a few shelters for the Red Lady Papaya saplings, planted a Passion Fruit sampling and was super excited as our little lemon plant has started bearing fruits. By the way the new plant on the block this weekend was the Passion Fruit plant. I packed the small plant into the soil with organic compost and gave it a rope to start its climb.
This weekend we didn't have time to make a structure for it to grow. That's a project I'll complete in the weeks to come.
We also noticed two tiny lemons today.

The rains have subsided a bit and I am guessing it's going to get super sunny in the days to come.  I decided to give small tempory covers for the papaya saplings using small dried sticks and plastic fabric, leaving the sides open for ventilation.
red lady papaya , organic farming, compost, papaya


We got two small tubs primer for the walls. Started off with Nerolac primer for the outer and the inner side of the walls. Since this is only the base coat we are still contemplating on the final color. May be burnt olive .... you have any thoughts or suggestions do message in the comments section.

It was a fun morning. I had packed some sandwiches and tea.

nerolac, asian paints, lemon tree, shistzu
Weekend -Week 3

Farmland Tales - Follow Our Journey

Oct - Week 1
This week ended with a long weekend and my husband and I could spend some extra time on the farm. I wanted to make raised beds and get those ready, but couldn't get that part of the work finished. In fact we could get it started either. We still don't have electricity on our farm so we are having to go a bit slow right now. Hopefully, that should come in a couple of months.

We had to clear all the trees on the land to level it initially and now I feel it looks really sad. I wanted to cover it with fruit trees to make it look a little better in my words ... a bit happier 😊😊.

So a couple of weeks back we planted our first Chikoo tree and Guava tree and then this week we planted some Moringa plants, Curry leaves plant, two lemon trees, and four Papaya saplings. I have used organic compost until now while planting. The ratio is 50-50. 50% soil and 50% organic compost.

There are quite a few different ways to make organic compost and a number of videos shared by organic gardeners on how to make that. I have added a link above that could possibly help you.


Moringa, drumsticks, super food

herbs for cancer treatment, moringa health benefits


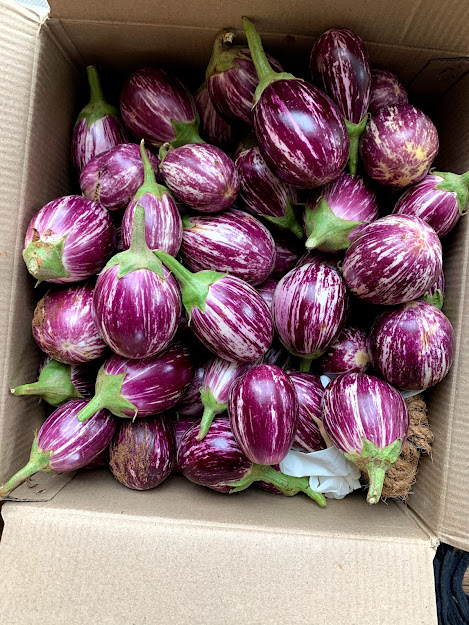
I picked up Red lady variety of Papaya saplings. This is a Thai variety of Papaya. Have planted them for the first time so let's see how they do. As a thumb rule about 15-20 cm. tall seedlings are planted during spring (February-March), monsoon (June-July) and autumn (October-November). To know more about the best season and soil information can be got from the National Horticulture Board 

 In case you have any suggestions on improving Papaya growth organically please do share your thoughts in the comments below. 

We also planted the Stevia shrubs we got a couple of weeks back. Made a makeshift shed for them in one of the far corners of the farm. Stevia is another super herb and beneficial to people suffering from Diabetes or looking at reducing sugar in order to lose weight. It is used extensively as an alternative to sugar. There are a lot of alternatives in the market today like dates sugar and cocopalm sugar, and Stevia is one of them. You can either buy ready-made Stevia powder off the shelf or dry leaves from Stevia plant in the shade and make your own powder. But be sure to check with your doctor before using natural Stevia. If you are keen on cultivating Stevia on a large scale there is a lot of help available online. 

We used some green net cloth of the shed and two strong branches for support. The green net coth would project the newly planted Stevia shrubs from the sun and the rain.

While the major part of the cultivation is still something we are planning, I am trying to include fruits and herbs which have health benefits. We will use these for our selves as well as for barter. 

Greenhouse, Red lady papaya, Stevia

You can see the damage the rain has done to our newly constructed wall. The flow of water was so strong that it pushes the mud on the other side through the wall. This will be redone as soon as the rains settle down a bit.

The sun is very strong when it isn't raining so I covered the seedlings with big Oak leaves to protect them. And of course you can see Bogie inspecting my work again.

After all the hard work we decided to rest a bit under the shade. The weather is beautiful. We set up our tents and opened up our picnic basket.

Tent pitching, camping, picnic


Sept Week 4

Its been raining really hard so this week we couldn't get anything done. Rain is totally welcome. Need it for the underground water beds to get recharged.  The pathway to our farm was completely flooded.


Sept Week 3

Wow today was one incredible day. Since we get to spend only a few hours per week on the farm we try to fit in as much as possible. So this week we had planned to doing some primer on the walls as well as hunt for the right nursery.
asian paints , outdoor paint, nerolac paint


We found an amazing nursery where I could find some of the fruit trees I really wanted as well as some other plants I was looking for. They have acres and acres of amazing plants. I picked up a couple of Dragon fruit plants, Passion fruit, Red Lady Papaya, Lemon, Moringa and Curry leaves to start with. We also got a couple of Stevia shrubs.

I was looking for a creeper variety of Rose which I wanted to plant at the main gate of the farm but couldn't get those yet.

swamy nursery atibele


Aug - 2019 Week 4 The walls are done and we planted our first fruit trees- Chikcoo and white-centered guava. And we have Bogie inspecting if I did it right

Chikoo tree plantation


Aug Week 3 We found a stream not very far from our farmland ... it’s a trek away 


Aug Week 2 

We started installing a compound wall around the land to avoid cattle from coming in. We had to get help from local workers to fit in the slabs. Our options were either building a brick wall or working with prefabricated ones. Opted for pre-fabricated walls. They are quicker to install and can be done really fast. 

We cemented the pillars so that they hold strong. Of course Bogie was part of the excitement and fell into the pits dugout for the pillars a couple of times.


pre-fabricated walls

Farmland shish tzu farm dogs

prefabricated walls


rubber boots for farm work


Hello peepa ... sharing our story about our latest DIY project —- getting our farmland up and running( not the typical big traditional farm but rather a small piece of land). Something we purchased almost 12 years ago but didn’t have the time to work on. We are building it our selves piece by piece and would be glad to get your comments or suggestions as to along. Neither of us is from a farming background. Sharing a few pics of what it was 4 months back to now.

We have our regular day jobs which we manage through the weekday and run off to the farm over the weekend. It has been a shift from looking forward to our typically parting-with-friends over the weekend to working-on-the-farm over the weekend.

Overgrown and wild ... that’s how it was 4 months back


We started the clearing work. We leveled the ground.  

farmland agriculture farm equipment JCB


Our little Shishtzu - Bogie is super excited to be here ... more excited were the crows. They are used to seeing farm cows and sheep’s much bigger than lil bogie and couldn’t help wonder what this tiny four-legged creature was! This little dog child of ours has been having a lot of fun running around